How to Use an API with Postman – A Step-by-Step Guide

In the field of software development, effective communication between different software systems is made possible through the essential function of Application Programming Interfaces (APIs). APIs allow developers to access and use the functionalities of
In the field of software development, effective communication between different software systems is made possible through the essential function of Application Programming Interfaces (APIs).
APIs allow developers to access and use the functionalities of a particular application, service, or platform. Postman is a powerful and user-friendly tool that simplifies the process of working with APIs.
In this comprehensive guide, we'll explore how to use Postman to interact with APIs effectively.
1. What is an API?
Before diving into Postman, let's briefly understand what APIs are.
An API, or Application Programming Interface, is a set of rules and tools that allows different software applications to communicate with each other. APIs define the methods and data formats that applications can use to request and exchange information.
Now, let's explore some common types of APIs that developers often encounter:
- RESTful APIs: Representational State Transfer (REST) is an architectural style for designing networked applications. RESTful APIs use standard HTTP methods (GET, POST, PUT, DELETE) to perform operations on resources. They are stateless and follow a client-server architecture, making them scalable and widely used for web services.
- GraphQL: GraphQL is a query language for APIs that allows clients to request only the data they need. Unlike REST, which exposes fixed endpoints for resources, GraphQL provides a more flexible and efficient way to interact with APIs, making it particularly suitable for complex data fetching requirements.
2. Introduction to Postman
Postman is a popular API development and testing tool that provides a user-friendly interface for working with APIs. It allows developers to create, test, and manage API requests effortlessly.
Whether you are a beginner or an experienced developer, Postman simplifies the process of interacting with APIs and is an essential tool for anyone working with web services.
3. How to install Postman
To get started with Postman, you first need to install it on your machine. Postman is available for Windows, macOS, and Linux. Visit the official Postman website to download the application.
Once downloaded, follow the installation instructions for your operating system. Follow the installation instructions, and if you encounter any issues, consider the following troubleshooting tips:
- Check Internet Connection: Ensure that your internet connection is stable, as Postman requires online connectivity for installation.
- Firewall Settings: Adjust your firewall settings to allow Postman to access the internet.
- Antivirus Software: Temporarily disable antivirus software during installation, as it may interfere with the process.
4. How to create a Postman account
While you can use Postman without an account, creating one comes with several benefits.
A Postman account allows you to synchronize your work across multiple devices, collaborate with team members, and access additional features.
Here's an outline of the advantages:
- Synchronization: Synchronize your work across multiple devices, ensuring consistency in your API development environment.
- Collaboration: Collaborate with team members by sharing collections, test scripts, and environments.
- Additional Features: Access advanced features such as monitoring, version control, and team collaboration.
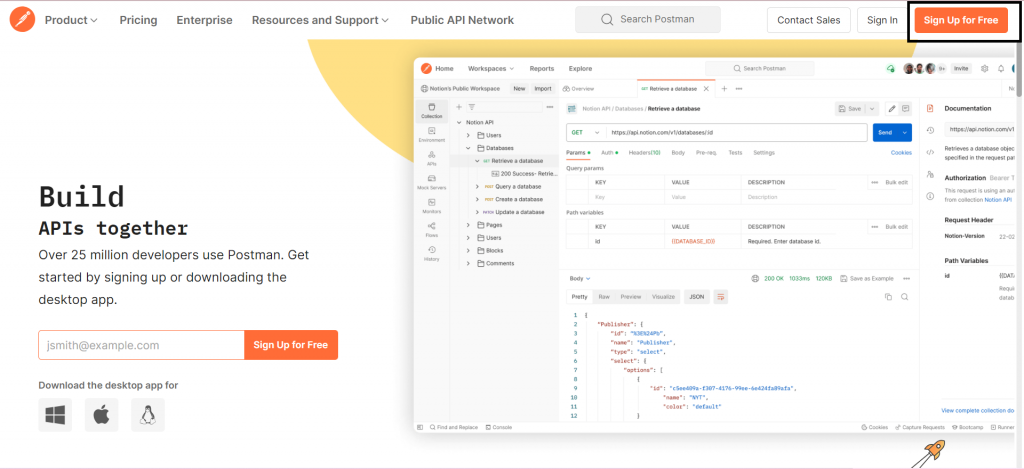
To create an account, click on the "Sign Up" button on the Postman website and follow the registration process.
5. How to make your first API Request
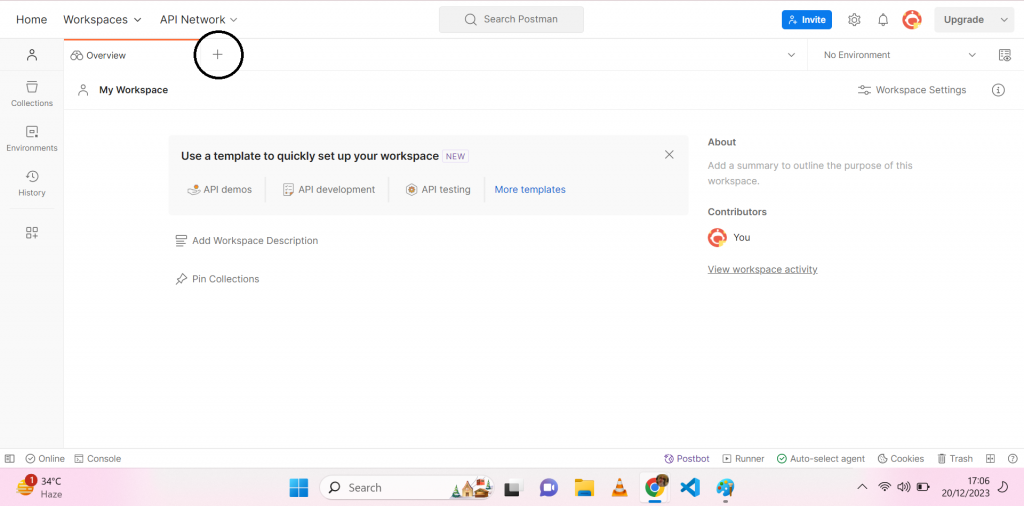
After installing Postman and creating an account (if desired), it's time to make your first API request. Open Postman and you'll be greeted with a clean and intuitive interface.
Follow these steps to make a simple GET request:
- Click the "+" button to create a new request tab
- Enter the API Endpoint: In the URL bar, enter the endpoint of the API you want to interact with. An example could be a weather API like
https://api.openweathermap.org/data/2.5/weather.
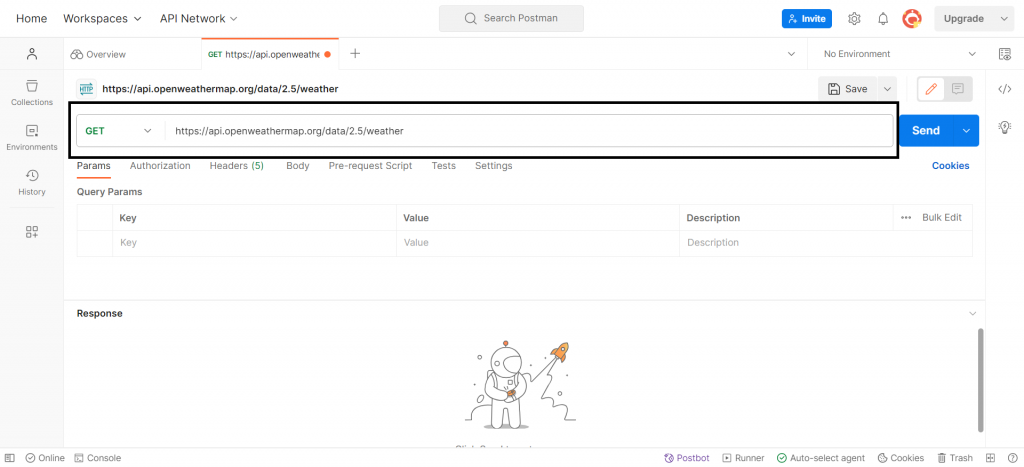
- Send the Request: Click on the "Send" button to execute the request. Postman will display the response from the API.
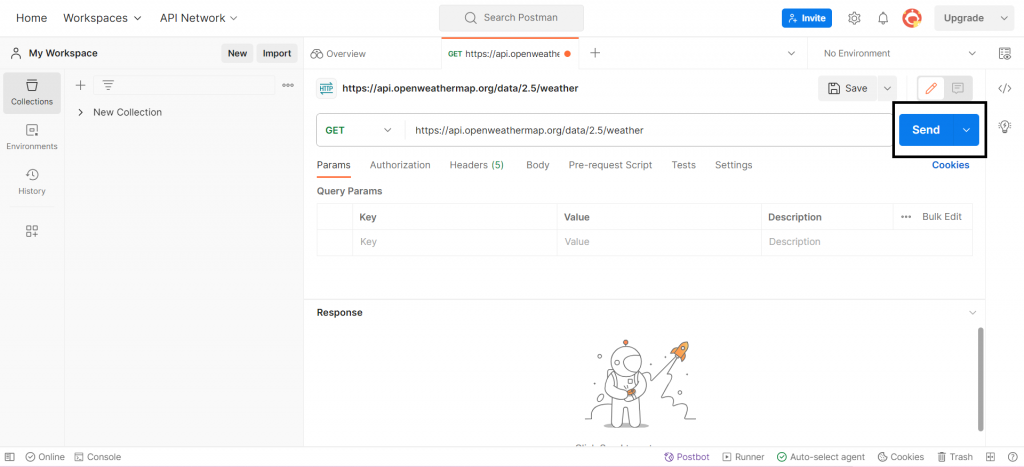
Congratulations! You've just made your first API request using Postman.
6. How to work with HTTP Methods
HTTP methods, also known as HTTP verbs, define the actions that can be performed on a resource. Postman supports various HTTP methods, and each has a specific purpose.
- GET Requests: Retrieve data from the server.
- POST Requests: Submit data to create a new resource.
- PUT Requests: Update a resource or create a new one if it doesn't exist.
- DELETE Requests: Delete a resource on the server.
6.1 How to create GET Requests
GET requests are used to retrieve information from the server. In Postman, follow the steps mentioned earlier to make a GET request.
6.2 How to create POST Requests
POST requests are used to submit data to the server to create a new resource. Here's an example of making a POST request:
Request Type: POST
URL: https://api.example.com/users
Body:
{
 "name": "John Doe",
 "email": "john@example.com"
}
6.3 How to create PUT Requests
PUT requests are used to update a resource or create a new resource if it doesn't exist. An example PUT request:
Request Type: PUT
URL: https://api.example.com/users/1
Body:
{
 "name": "Updated Name"
}
6.4 How to create DELETE Requests
DELETE requests are used to delete a resource on the server. Example:
Request Type: DELETE
URL: https://api.example.com/users/1
7. How to handle Request Parameters
APIs often require additional information to process requests. Postman allows you to include parameters in different ways. They include:
- Query Parameters: Used for filtering or sorting data in the URL.
- Request Headers: Provide additional information about the request or the client.
- Request Body: Contains data for POST and PUT requests.
7.1 What are Query Parameters?
Query parameters are included in the URL and are used for filtering or sorting data. For example:
URL: https://api.example.com/products?category=electronics&price=100
7.2 What are Request Headers?
Headers provide additional information about the request or the client. In Postman, you can add headers in the Headers tab.
Key: Authorization
Value: Bearer YourAccessToken
7.3 What is the Request Body?
For POST and PUT requests, data is often sent in the request body. In Postman, switch to the Body tab and choose the data format (for example, JSON or form-data) before entering the data.
8. How to authenticate in Postman
Postman supports various authentication methods to secure your API requests. Authentication is crucial for API security. Postman supports:
- API Keys: Include API keys in request headers.
- Bearer Tokens: Authenticate with tokens in the Authorization header.
8.1 How to authenticate using API Keys
If an API requires an API key for authentication, you can include it in the request headers. For example:
Key: X-API-Key
Value: YourAPIKey
8.2 How to authenticate using Bearer Tokens
For APIs using token-based authentication, you can include the token in the Authorization header.
Key: Authorization
Value: Bearer YourAccessToken
9. How to organize Requests with Collections
Postman allows you to organize your requests into collections, making it easier to manage and share them. Collections can be used to group related requests, and you can also include documentation and test scripts within a collection.
To create a collection, click on the "New" button in the left sidebar and choose "Collection." Give your collection a name and start adding requests to it.
10. How to automate Workflows with Postman Scripts
Postman supports scripts written in JavaScript, which can be used to automate tasks and enhance your workflow. You can add scripts to different parts of a request, such as pre-request scripts or test scripts.
Here's a simple example of a pre-request script that generates a timestamp and includes it in the request headers:
// Pre-request Script
const timestamp = new

 Date().getTime();
pm.request.headers.add({ key: 'Timestamp', value: timestamp });
11. How to test APIs with Postman
Postman provides a robust testing framework that allows you to write scripts to verify the behavior of your APIs. Write test scripts to:
- Verify Status Codes: Ensure the server responds as expected.
- Check Response Data: Validate the correctness of the returned data.
11.1 How to write Test Scripts
Test scripts can be added to the Tests tab of a request. Here's an example of a simple test script that checks if the response status is 200:
// Test Script
pm.test("Status code is 200", function () {
 pm.response.to.have.status(200);
});
11.2 How to run Tests
After writing test scripts, you can run them by clicking on the "Send" button. Postman will execute the request and display the results of the tests in the Test Results tab.
12. How to monitor APIs with Postman
Postman offers a monitoring feature that allows you to schedule and run collections at predefined intervals. This is useful for monitoring the performance and health of your APIs over time.
To set up monitoring, navigate to the "Monitor" tab and create a new monitor. Specify the collection to be monitored, set the schedule, and Postman will take care of the rest.
Schedule collections to run at intervals, allowing you to:
- Identify Performance Issues: Detect anomalies in response times.
- Ensure Reliability: Monitor for errors or unexpected behavior.
13. How to export and import Postman Data
Postman allows you to export your collections, environments, and other data for sharing or backup purposes. To export, go to the "Settings" icon in the top-right corner and select "Export."
To import data, use the "Import" option in the same menu. You can import collections, environments, and data dumps from other tools.
14. How to collaborate with Postman
Collaboration is a key aspect of software development, and Postman provides features to facilitate teamwork. You can share collections with team members, comment on requests, and use the built-in collaboration features.
To collaborate on a collection, click on the "Share" button in the top-right corner. You can generate a link to share or invite team members directly.
15. How to troubleshoot Common Issues
Working with APIs can sometimes lead to issues. Postman provides tools to help troubleshoot problems. You can check the response status, headers, and body to identify potential issues. You can also utilize Postman's console to view logs and debug scripts.
If you encounter issues with authentication, double-check your credentials and ensure they are correctly configured in Postman.
Follow this checklist for troubleshooting common API-related problems:
- Check Internet Connection: Ensure a stable internet connection.
- Firewall and Antivirus: Adjust settings to allow Postman access.
- API Endpoint: Verify the correctness of the API endpoint.
- Authentication Credentials: Double-check API keys or tokens.
- Request Structure: Confirm the correct structure of your API requests.
16. Conclusion
In this comprehensive guide, we've covered the fundamentals of using Postman to interact with APIs.
From making simple requests to organizing workflows with collections and writing test scripts, Postman offers a versatile and user-friendly environment for API development and testing.
Whether you're a beginner or an experienced developer, mastering Postman can significantly enhance your productivity in working with APIs. Start exploring the features mentioned in this guide, experiment with different APIs, and gradually build your proficiency in using Postman to streamline your development process.
Happy coding!
