
ПІДТРИМАЙ УКРАЇНУ
ПІДТРИМАТИ АРМІЮ
How to Dockerize FastAPI
If you're just here to copy and paste, here's the final Dockerfile that will produce an image for...
If you're just here to copy and paste, here's the final Dockerfile that will produce an image for your FastAPI app:
FROM python:3.9

WORKDIR /code

COPY ./requirements.txt /code/requirements.txt

RUN pip install --no-cache-dir --upgrade -r /code/requirements.txt

COPY ./app /code/app

CMD ["fastapi", "run", "app/main.py", "--port", "3000"]
And here's the .dockerignore file you should use:
__pycache__
*.pyc
*.pyo
.venv
venv
dist
build
Depending on what else is in your project, you might want to add more files to the .dockerignore file! You should realize if the context copying takes too long.
To build and run the image, use these commands:
docker build -t fastapi-app .
docker run -p 3000:3000 fastapi-app
Not just here to copy and paste? Let's go over what's happening in the Dockerfile!
(can I still use that gif or is it uncool already? :/)
The Setup
For this tutorial, I assume you have a FastAPI project set up. FastAPI is a modern, fast (high-performance), web framework for building APIs with Python 3.7+ based on standard Python type hints. If you have a different setup, you might need to adjust the Dockerfile accordingly.
Typically, you'd run pip install -r requirements.txt and then fastapi run app/main.py --port 3000 to work locally. For deployment, we'll use a similar approach but within a Docker container.
Let's get into the details of the Dockerfile!
The Dockerfile
FROM python:3.9

WORKDIR /code

COPY ./requirements.txt /code/requirements.txt

RUN pip install --no-cache-dir --upgrade -r /code/requirements.txt

COPY ./app /code/app

CMD ["fastapi", "run", "app/main.py", "--port", "3000"]
So what's happening here?
- Base image:
- Uses Python 3.9, providing a solid and widely used base image. You can also use a more recent version of Python, whatever you need.
- Working directory:
- Sets up
/codeas the working directory for subsequent instructions.
- Sets up
- Dependency installation:
- Copies
requirements.txtto the working directory. - Runs
pip installto install the dependencies specified inrequirements.txt.--no-cache-dirhelps keep the image size down.
- Copies
- Application code:
- Copies the rest of the application code into the container.
- Start command:
- Specifies the command to run the application using
fastapi run app/main.py --port 3000.
- Specifies the command to run the application using
This approach is very minimal, getting your FastAPI app up and running quickly inside a container. You can also use uvicorn or nginx when you're used to it. You can read some of the official documentation here: FastAPI
Make sure to add the .dockerignore file to ignore unnecessary files like __pycache__ and any virtual environment. This will speed up the build process and reduce the image size. Here's a good starting point for your .dockerignore :
__pycache__
*.pyc
*.pyo
.venv
venv
dist
build
Deployment
You can deploy this Docker container to any cloud provider that supports Docker. For example, you could use platforms like Heroku, DigitalOcean, or AWS ECS. Because I am the co-founder of Sliplane , I will show you how to deploy it there.
After signing up, you can create a new service by selecting your Github Repository. Then just keep the default settings and click on deploy.
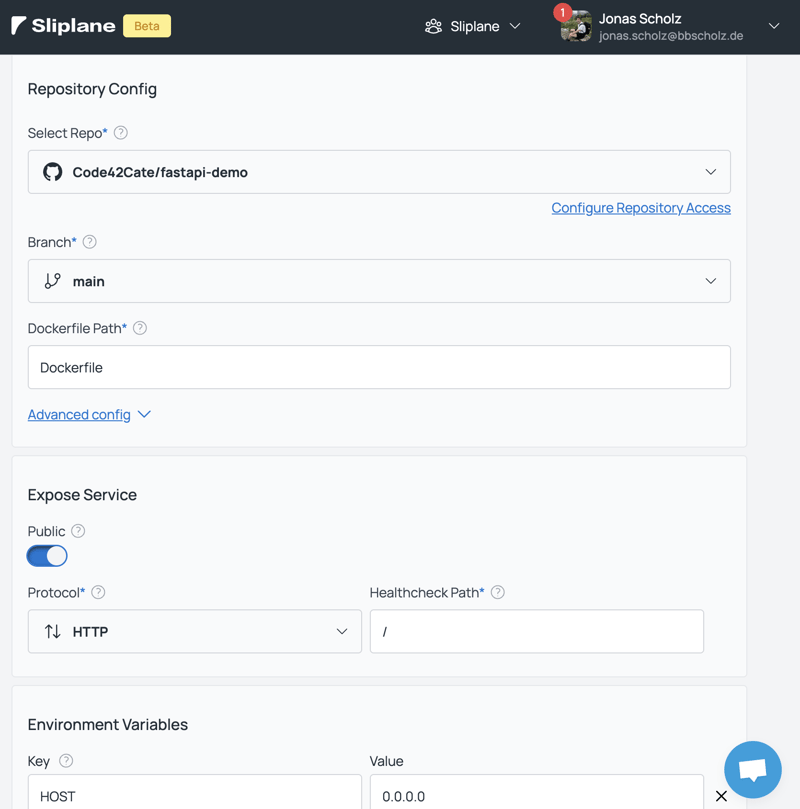
After deployment, your FastAPI app will be available under a subdomain of sliplane.app , usually it's just your service name.
You can also see the logs of your app, see metrics such as CPU and memory usage, add persistent storage, and much more. Whenever you push to your repository, Sliplane will automatically deploy your app.
If you want to try out Sliplane , the first 2 days are free! Try it out and let me know what you think :)
Ресурс : dev.to